The rule of thumb with leather scratch repair is to let your fingers be the judge. If you can feel the damage caused by your dog or cat, then it needs repair. Otherwise a new finish will correct it.
Click here to repair cat scratches.
Click here to fix dog scratches.
Leather Cat Scratch Repair
Cat scratches and claw marks on real leather are easily repaired with little more than super glue and sandpaper. Scroll down or click here for a video demonstration.

Unfortunately cat scratches on vinyl, bonded or faux leather are not so easily repaired. These synthetics require a flexible filler putty used according to these instructions.
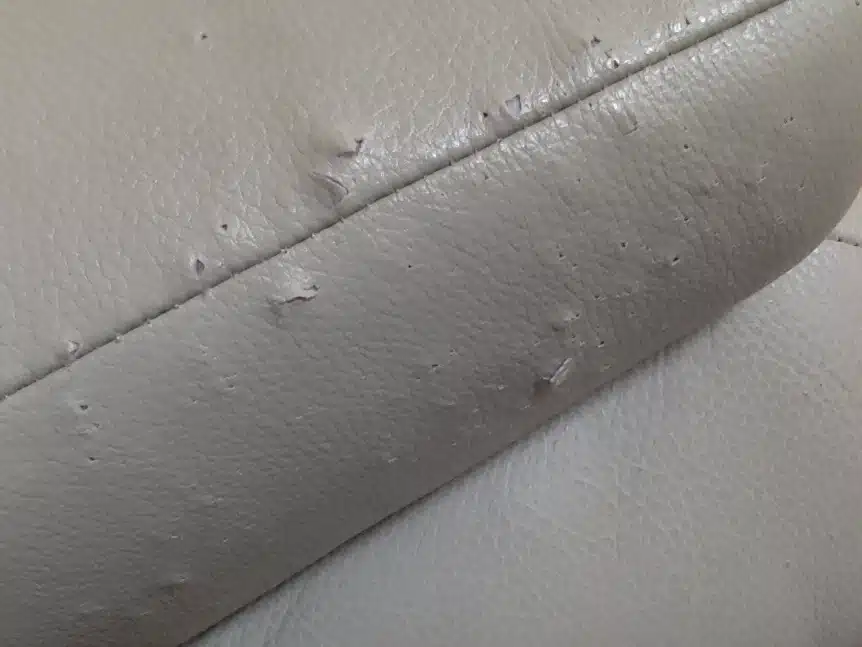

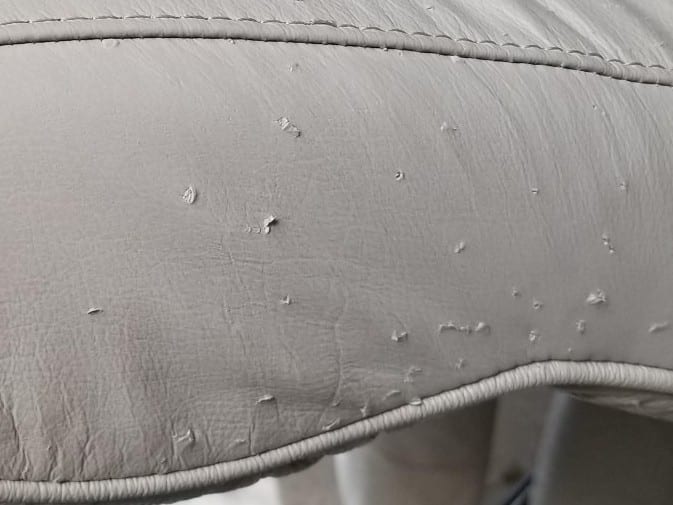
More severe ‘scratching post’ damage is also best repaired using a flexible filler. Use scissors or an electric razor to trim away any shredded or flappy fibers and level the surface before applying leather filler.

Repair Cat Scratches on Real Leather
- 0:33 – Secure flaps with super glue
- 1:55 – Sand with 320 grit sandpaper
- 2:04 – More super glue
- 2:17 – More sanding
- 2:35 – Apply color, dry, and reevaluate
- 3:12 – Feathering and texturizing
- 3:52 – Polish with 500 grit sandpaper
- 4:40 – More color
- 5:04 – Stipple the color to conceal streaks
- 5:24 – Before and after
- Clean the surface with alcohol to remove other conditioners or protectants. Allow to
dry. - Trim or tack down any small flaps. Trim away flaps that do not tack down smoothly.
Use a tiny drop of super glue to tack flaps back into place. Quickly remove excess
super glue with a paper towel. - Apply a thin coat of Rub ‘n Restore® Color to the leather, and allow to dry. The color
will correct minor scuffs, making areas of damage more obvious and therefore
minimizing your work. If you can’t feel the damage, it doesn’t need repair! - Apply a tiny amount of super glue to the area needing repair using a large needle or
toothpick. Use the corner of a paper towel to feather the glue along its perimeter and
to clean up excess. Work in thin layers and avoid coating large areas, as the glue dries
hard and rigid. - Gently sand in a parallel direction of the crack / tear while the glue is still wet. The
fine dust from the leather and / or Rub ‘n Restore® paint catalyzes the super glue. - Repeat steps 4-5 until the surface feels smooth. If you have streaks from excess super
glue, sand these areas until they are minimal. Use 500 grit sandpaper to polish. - Dab or stipple a thin coat of Rub ‘n Restore® Color on the repaired area using a damp
sponge. Allow to dry, and repeat as needed, blending outward. Follow with the desired
clear finish. Please refer to our application instructions for these products. - If your repair needs re-working, you can repeat steps 4-5 without having to remove
Rub ‘n Restore® Color. Make sure the color is dry before reworking your repair.
Please do not declaw your feline!
This procedure is amputation of the bone to the last knuckle, not mere removal of the nail. Onychectomy is banned in many countries and opposed by the Humane Society and the American Society for the Prevention of Cruelty to Animals. Declawing can decrease use of a litter box and increase biting. Cats are smart creatures and can be easily trained with a spray bottle of water (set on shoot-to-soak) and pheromone sprays. Give them a scratching post where they can engage in their natural behavior. You can also trim their claws using pet nail clippers.
Repair Dog Scratches on Leather
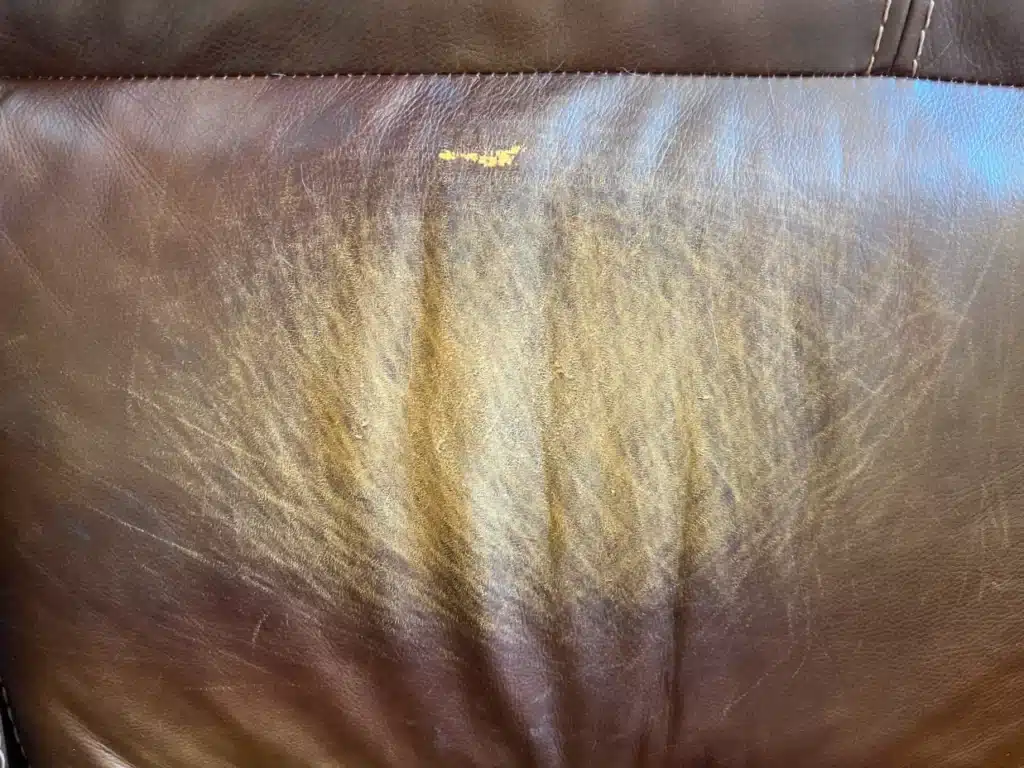

Dog scratches are often superficial. If the damage cannot be felt with a fingertip, then a coat of color will usually fix it. If it doesn’t, you can always remove the color with alcohol or lacquer thinner and proceed with repair.
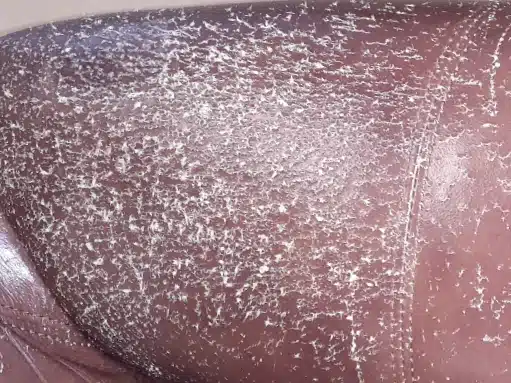
Leather that is scaly, cracking or chafed should be repaired with a flexible filler putty as demonstrated at minute 8:00 here.
If you’ve got severe dog chew damage, click here.
Thanks for the great tips. What is the product you’re using which you’ve called Rubber Restore?
You’re on the right website. Here’s the catalog.
I have a large scale hunter (dark) green sofa, love seat, wide chair and ottoman. They are very soft and comfy but I think would work as I see similar styles in your before and after gallery. I’m thinking Taupe — will that cover OK? Also have cat scratches and a few pin holes from back claws climbing up the arms. Assume your filler will take care of that as directed?
Thanks in advance. This may be the perfect short term fix until I move in a couple of years.
Any holes need to be subpatched before repair. We’d need you to submit photos in the evaluation for us to advise you better. Color changes are inherently more maintenance and not recommended if the leather is already rather worn and dogs will continue to use the piece(s).
Great video/tutorial. My main question is, after the final coat of restorer, the leather looked quite different(flat finish) as compared to the rest of the couch(semi-glossy).
Will your product buff out by hand with a terry cloth towel or a car buffer? How long to wait after application before buffing?
Buffing with a dry rag (and use) will slightly polish the color. But for a semi-gloss finish, sounds like you need some Clear Prep+Finish. I’d mix it with equal parts color and use to add luster and blend surrounding areas.
Can your product be used successfully without having to repaint or try to match color.? Leather chair is mauvish/pinkish. Cat scratched.
The need is white leather sofa being scratched by dogs accidentally. How do I know what shade of white to purchase? Barbara. Tx
A new finish is needed to conceal repairs 99% of the time, especially on cat scratches repaired with this method. A mauve or pink color would absolutely need customization lest you want to refinish the entire chair in a different color and have the potential of more maintenance.