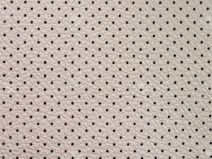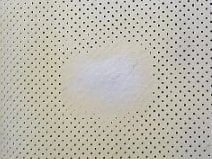

Perforated leather or vinyl upholstery is a tricky repair. If the perforations no longer align, the result is likely to be imperfect. Each hole needs to be preserved or re-created in order to avoid a patched appearance. Minimalism and precision are key!
Here’s how to repair perforated leather or vinyl:
- Subpatch any holes or tears with denim or twill fabric and a strong, flexible fabric glue.
- Apply Soft Filler to the remaining tear or hole. This link has a video of the basic technique.
- Use a glossy business card or plastic spreader to swipe the filler in the direction of the tear, removing all excess from surrounding perforations, until a level surface is achieved.
- While the filler is still wet, use a large needle to re-punch the perforations in the repair area to avoid a solid, patched appearance.
- Allow the filler to cure.
- If necessary, re-punch the perforations once more.
- Repeat steps 2-6 until the repair is level and can no longer be felt.
- Rubbing alcohol and an old t-shirt can be used to correct minor lines or imperfections in the surface, especially along the perimeter of the repaired area. Sandpaper can also be used, but it may peel up the filler where it is thinly spread on any undamaged, surrounding surface.
- Apply a final thin coat of filler, and emboss with a gloved hand to impart texture and mimic the grain of the leather. Re-punch all holes.
- Allow to cure.
- Apply color and finish. The shadow created from the perforation should create a black dot that appears uniform with the rest. One could also paint the black dot(s) on the area (so long as the leather is not already black in color).
I am buying a used car that has a poorly repaired leather patch on it just like the one in the picture above. Is it possible to remove that patch and then re-patch it better on my own?
It’s a gamble. Removing repairs often do a little more damage. It would certainly be worth it on a solid, non-perforated leather. A solvent like lacquer thinner should remove the finish and help thin the repair. As long as the subpatch is good, you don’t have to do any cutting or make a mess of things. If the patch on the perforated leather is smooth and the color is good, I would just buy a special leather needle and punch the holes into the repair.
“1. Subpatch any holes or tears.” How? With what products?
Click the link about Soft Filler to see a video demo. The hole needs to be subpatched with a denim or twill patch and a fabric glue.
The perforated leather of my car seats still looks good, but a few small breaks between perforations are occurring, so there is no appreciable tear. It would be difficult to insert a sub-patch under the tear. Is there a way to mend the tear with an adhesive and no sub-patch?
Good question, Jim! Repairing these cracks now will keep them from erupting into larger tears and a more complex repair. Depending on the scope of the damage, you could work with tiny beads of super glue catalyzed with sanding. This is best suited to a small area that doesn’t require much flexibility. Alternatively you can apply a thin bead of filler to the cracks and let cure. Either way I’d use a large needle or toothpick or our groovy needle tool for these detailed repairs.